Figues and Tables
Overview
Teaching: 15 min
Exercises: 15 minQuestions
How do you create tables in LaTeX?
How do you insert images in LaTeX?
Objectives
Understand how to create tables
Understand how to insert images
Understand that LaTeX tries to determine where to place images and tables but doesn’t always get this right.
Understand how to override the placement options
Tables in LaTeX
Table Headings
Tables in LaTeX are probably one of the “less nice” bits of the language and can be a little fiddly to get working. They are created using the \begin{tabular} and \end{tabular} commands. Each column’s justification is then specified with a single letter, l for left, c for centre or r for right. You need to put one letter for each column you want to create.
\begin{tabular}{ l l l}
The above will create a table with 3 columns that are all left justified.
Custom Column Widths
You can also specify a custom with column with the p column type, folow this with {1cm} to have a 1 centimetre wide column.
\begin{tabular}{ p{1cm} p{1cm} p{1cm}}
Table Contents
Now we need to specify the contents of a table. This is done by writing the value for a column, then an & symbol to get the next colmun and finally ending the line with a \\. For example:
1 & 2 & 3 \\
will create put 1, 2, 3 into the first, second and third columns. We can then repeat this process for as many rows as we want.
Ending the table
To end the table we used the \end{tabular} command.
Putting a line between each column/row
Placing a | symbol between each column heading specification will show vertical lines down the table. If we want a line between rows we can use the \hline command at the end of the rows (it doesn’t have to be on every row).
\begin{tabular}{l | l | l}
\hline
1 & 2 & 3 \\ \hline
4 & 5 & 6 \\ \hline
7 & 8 & 9 \\ \hline
\end{tabular}
Centering the entire table
Its quite common to see entire tables placed inside center blocks (starting with \begin{center} and ending with \end{center}). This centers the entire table on the page. For example:
\begin{center}
\begin{tabular}{l | l | l}
\hline
1 & 2 & 3 \\ \hline
4 & 5 & 6 \\ \hline
7 & 8 & 9 \\ \hline
\end{tabular}
\end{center}
Captioning and Labelling Tables
A can be captioned with the \caption{} command, but before we can use this we have to wrap the table inside an extra container using the \begin{table} and \end{table} commands wrapping the entire table. For example:
\begin{table}
\begin{center}
\begin{tabular}{l | l | l}
\hline
1 & 2 & 3 \\ \hline
4 & 5 & 6 \\ \hline
7 & 8 & 9 \\ \hline
\end{tabular}
\end{center}
\caption{A table}
\end{table}
This table environment also automatically numbers the tables in the order they appear in the document.
Labelling Tables
We saw the \label{} command back when we were talking about sections of a document. We can use it with a table too, so that we can reference the table’s number elsewhere in a document with the \ref{} command. By convention labels for tables will be started with the word tab:, but LaTeX doesn’t enforce this.
\begin{table}
\begin{center}
\begin{tabular}{l | l | l}
\hline
1 & 2 & 3 \\ \hline
4 & 5 & 6 \\ \hline
7 & 8 & 9 \\ \hline
\end{tabular}
\end{center}
\caption{\label{tab:example}A table}
\end{center}
\end{table}
See table \ref{tab:example} for a table of numbers.
An Easy Table Generator
Tables exercise
Create a table to show a calendar and do the following:
- Give it 7 columns and 5 rows,
- Make each 1.5cm wide
- Make the first row the days of the week, starting from Monday (or just Mon). Make these in bold text.
- Put a 1 in the first column on the second row and work up to 28. This should give a calendar for February 2021.
- Create a solid line between the days of the week and the numbers
- Caption it “Calendar for February 2021”
- Give it the label “tab:calendar-feb-2021”, write some text to reference this label underneath the table.
Solution
\documentclass{article}
\begin{document}
\begin{table}
	\begin{center}
	\begin{tabular}{p{1.5cm}  p{1.5cm}  p{1.5cm}  p{1.5cm}  p{1.5cm}  p{1.5cm}  p{1.5cm}}
		\textbf{Mon} & \textbf{Tue} & \textbf{Wed} & \textbf{Thu} & \textbf{Fri} & \textbf{Sat} & \textbf{Sun} \\ \hline
		1 & 2 & 3 & 4 & 5 & 6 & 7 \\
		8 & 9 & 10 & 11 & 12 & 13 & 14 \\
		15 & 16 & 17 & 18 & 19 & 20 & 21 \\
		22 & 23 & 24 & 25 & 26 & 27 & 28 \\
	\end{tabular}
\caption{\label{tab:calendar-feb-2021}Calendar for February 2021}
\end{center}
\end{table}
See table \ref{tab:calendar-feb-2021} for a calendar of February 2021.
\end{document}
Images in LaTeX
Images in LaTeX require a special pacakge called graphicx to be included, an image starts with the \begin{figure} command and is then followed with the \includegraphics{filename} commmand and finally \end{figure}.
\documentclass{article}
\usepackage{graphicx}
\begin{document}
\begin{figure}
\includegraphics{chemicals.png}
\end{figure}
\end{document}
You can find the referenced image, chemicals.png at ../files/chemicals.png.
Placing Images
LaTeX often places images a long way from the surrounding text, especially in big documents. This can even be several pages away from where they are being discussed. We can override the placement by adding a [h] or [ht] to the end of the \begin{figure} command, the h means that you definitely want the image here, t means the top of the page. You can also add an exclamation mark (!) to tell LaTeX to override some of its rules on placing images.
\documentclass{article}
\usepackage{graphicx}
\begin{document}
\begin{figure}[ht!]
\includegraphics{chemicals.png}
\end{figure}
\end{document}
Captioning Images
Like with tables we can caption an image using the \caption{} command and label it using the \label{} command, so that we can reference it elsewhere in the document. By convention labels for images start with the name “fig:”.
\documentclass{article}
\usepackage{graphicx}
\begin{document}
\begin{figure}[ht!]
\includegraphics{chemicals.png}
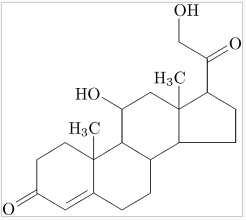
\caption{label{fig:chemicals}Corticosterone}
\end{figure}
\end{document}
Figure \ref{fig:chemicals} shows the chemical structure of Corticosterone.
Sizing Images
Image sizes on the page can be specified with the [width=xcm] or [height=xcm] options on the \includegraphics line. You can also specify this in inches by using in, or millimetres by using mm instead of cm.
\documentclass{article}
\usepackage{graphicx}
\begin{document}
\begin{figure}[ht!]
\includegraphics[width=12cm]{chemicals.png}
\caption{label{fig:chemicals}Corticosterone}
\end{figure}
\end{document}
Figure \ref{fig:chemicals} shows the chemical structure of Corticosterone.
Images Exercise
Place the following lines of code in the correct order:
- \includegraphics[width=5cm]{mypicture.jpg}
- \begin{figure}
- \end{figure}
- \caption{label{fig:mypic}A Picture of me}
Solution
2,1,4,3
Key Points
Images are inserted with the figure environment.
Tables are created with the tablular environment.
Locations can be specified with the [h] option meaning here, of [ht] meaning here, top.
Tables and images can have labels to make their referencing easier.
Tables and images can have captions.